
You've settled on a new brand name, updated the logo, and started rewriting the homepage. Then you open Shopify and realize the old name still appears in settings, customer messages, and links you've shared elsewhere. Changing the name looks simple, but you don't want a branding update to become a domain migration or leave customers wondering whether their order came from the right business.
Table of Contents
- Why This Rename Feels Bigger Than the Click
- Changing the Store Name in Shopify Admin
- Store Name vs myshopify.com Subdomain vs Custom Domain
- When You Actually Need to Change the Domain Too
- Verifying the New Name in Customer-Facing Messages
- Things That Often Break After a Rename
- Your Rebrand Checklist and Common Questions
Why This Rename Feels Bigger Than the Click
A Shopify change store name task deserves a clear scope before anyone edits settings. Are you changing the business identity customers recognize, cleaning up an internal label, or moving the storefront to a different web address? Those goals overlap, but they shouldn't share an unchecked launch button.
The operational mistake is treating every occurrence of the old name as the same kind of setting. A label in the admin, a public web address, and text inside a notification template require different decisions and different checks.
Define the jobs before assigning the work
Separate the rebrand into these workstreams:
- Administrative naming: Decide the exact spelling, capitalization, and store label your team should use.
- Domain planning: Decide whether customers need a different address, rather than changing one because it contains the old brand.
- Customer-facing verification: Check what shoppers see in the storefront, messages, documents, and post-purchase experience.
Keep a small change log with the current value, intended value, person responsible, and verification result. That gives your support team something concrete to consult when a customer asks about an unfamiliar sender name or an old link.
Practical rule: Approve the brand identity first. Change technical addresses only when there's a clear customer-facing reason.
Choose ownership, not just a launch date
Someone should own the rename in Shopify, someone should approve domain decisions, and someone should test the customer journey. The same person can perform every job, but each job still needs an explicit completion check.
If you're deciding whether to handle this internally or bring in implementation help, Alpha Omega Digital on Shopify partners is a useful resource to consult while evaluating that support.
Don't announce the rebrand merely because the settings field has been saved. Announce it when the customer experience has been checked, including the less visible places customers encounter after paying.
Changing the Store Name in Shopify Admin
Save the existing name before editing it. Record its spelling and capitalization in your change log, then confirm the approved replacement. This prevents a branding discussion from turning into repeated edits while other people are updating templates.
Keep your app dashboard available for the later verification pass.
Follow the store contact details path
Shopify's store details instructions place the rename under Settings > General > Store contact details on desktop and in the Shopify mobile app, and explicitly distinguish it from changing the default domain.
- Open General: In Shopify admin, go to Settings, then General.
- Find Store contact details: Open that section and locate the Store name field.
- Enter the approved name: Check spacing and capitalization before saving.
- Save and verify: Save the change, revisit the field, and confirm the intended value remains.
Don't assume typing the replacement completes the operation. The documented workflow includes saving, so make that a deliberate action in your checklist.
Keep internal naming separate
Shopify also provides organization-level store naming and initials through Settings > Organization, as described in the store details instructions above. If your team uses those labels to distinguish storefronts, review them separately rather than expecting the General settings edit to handle them.
For agencies, internal labels should help staff select the correct store. They don't need to carry every marketing detail, and they shouldn't make similar storefronts harder to distinguish.
The walkthrough below provides a visual companion to the settings task.
If the rename sits inside a broader storefront rebuild, consult Wistec's Shopify website guide alongside your implementation checklist. Keep the settings edit and the website changes as separate sign-offs, even when you release them together.
Store Name vs myshopify.com Subdomain vs Custom Domain
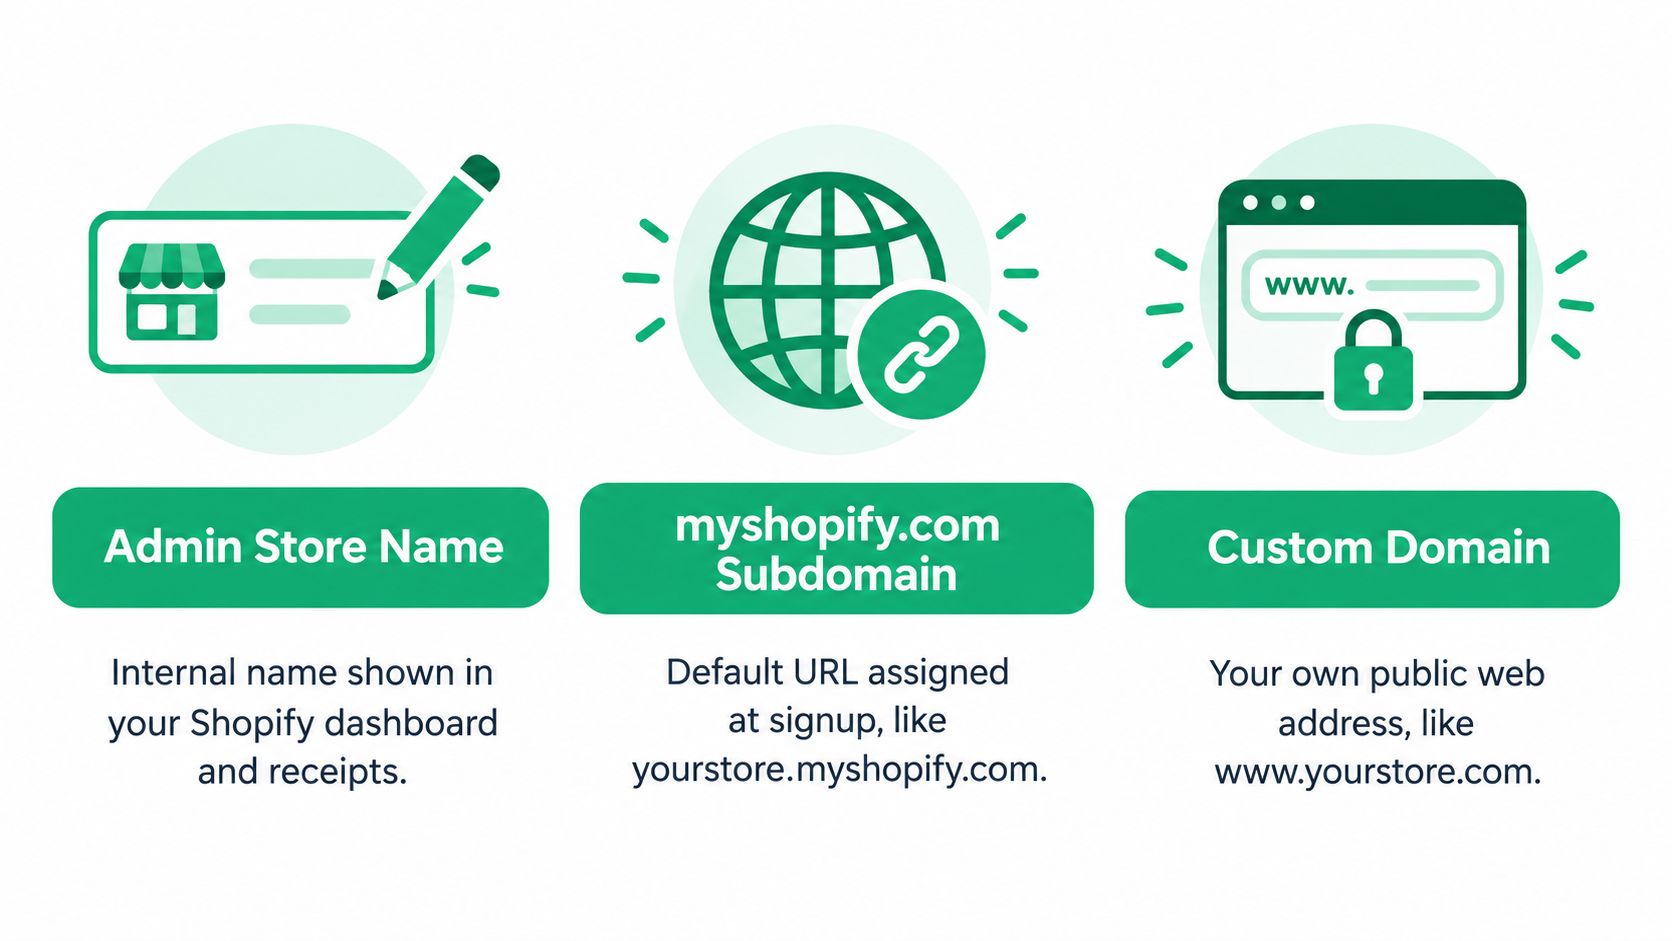
A name and an address solve different problems. The store name identifies the business in relevant administrative and communication contexts. The default Shopify address identifies a web location, while a custom domain gives you a customer-facing address you control.
Use the comparison below to identify which layer your request targets.
Naming Layers in a Shopify Store
| Layer | Where it shows up | How to change | Editable limit |
|---|---|---|---|
| Admin store name | Administrative areas and communications that use the store name | Edit Store name in General settings | Separate from the domain-change allowance |
| myshopify.com subdomain | Shopify's default store web address | Review the available change option in Domains settings | Restricted, check your store's available allowance |
| Custom domain | The public address customers use | Connect the intended domain and assign it as primary | Requires a separate domain setup and verification process |
Shopify's online store setup guidance states that the myshopify.com domain can be changed up to two times, and that entering a store name during signup counts as the first change, leaving one additional change. Treat that allowance as a budget, not a cosmetic preference.
Match the control to the request
If your request is “make the business name correct,” edit the label. If it's “give customers a new branded address,” assess the custom domain. Only consider the default subdomain when there's a specific reason to change that technical address.
Shopify's documentation isn't entirely consistent about the available default-domain allowance, so verify the limit displayed in your own admin before committing. Don't use a restricted change to experiment with spelling or test a temporary campaign identity.
A custom domain decision should follow the customer's needs. A default subdomain change shouldn't be a reflexive part of every rebrand.
Get the final name approved outside Shopify first. That keeps a limited technical setting out of the creative review process.
When You Actually Need to Change the Domain Too
Change the public domain when keeping it would confuse customers or undermine the intended brand identity. Don't migrate it just to make every technical identifier look tidy. The right question is whether the customer benefits enough to justify the additional verification work.
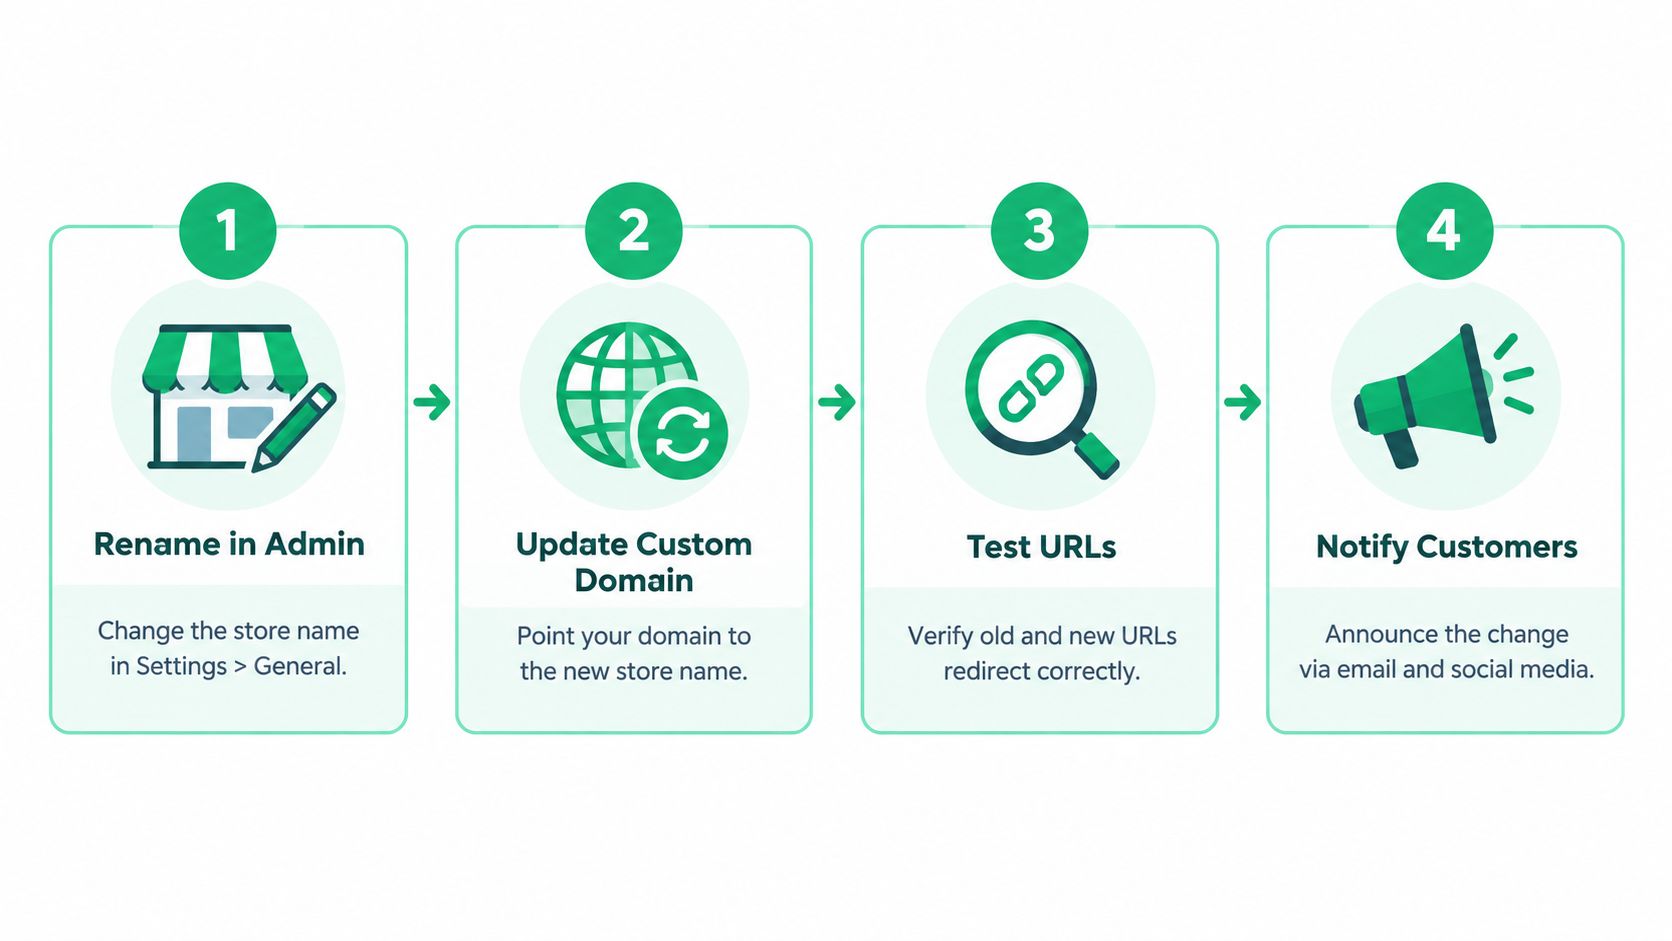
Treat the visual sequence below as a planning aid. Renaming the store doesn't automatically point a domain at anything new.
Connect first, then approve the public switch
Complete the administrative rename, then confirm that the intended domain belongs to the business and that the person managing it can access its settings. Add or connect it under Settings > Domains, following Shopify's workflow rather than improvising configuration changes.
Allow for connection time. As noted in Shopify's setup guidance above, a custom domain can take up to 48 hours to connect before it can be used as the primary domain. Keep that connection window separate from your announcement schedule.
Shopify's general setup checklist states that stores support up to 20 domains or subdomains in addition to the default Shopify URL, or up to 1,000 on Shopify Plus. Those allowances don't replace the need to decide which address customers should see.
Verify the migration as a customer journey
Before announcing the new address, work through this acceptance list:
- Old entry points: Open existing homepage, product, collection, and order-related links, then inspect where they lead.
- Search signals: Verify canonical URLs, sitemap availability, and Search Console ownership for the intended public address.
- Commercial traffic: Check ad landing pages and analytics referral attribution.
- Connected systems: Review webhooks, ERP integrations, and API-configured callbacks for domain-dependent values.
Use this ecommerce SEO guide as a companion when reviewing search-related migration tasks. Record the actual result of each check instead of marking the entire domain change complete because the homepage opens.
Finally, test post-purchase links independently. Don't infer that an administrative rename changes an installed app relationship or an embedded order-status experience, and don't infer that a working homepage proves those journeys are correct.
Verifying the New Name in Customer-Facing Messages
The inbox is part of the storefront. A new logo on the homepage won't prevent confusion if an order confirmation still carries the previous identity. Audit the messages customers receive, not just the templates your team remembers editing.
Look at each message on a phone as well as in its template preview.
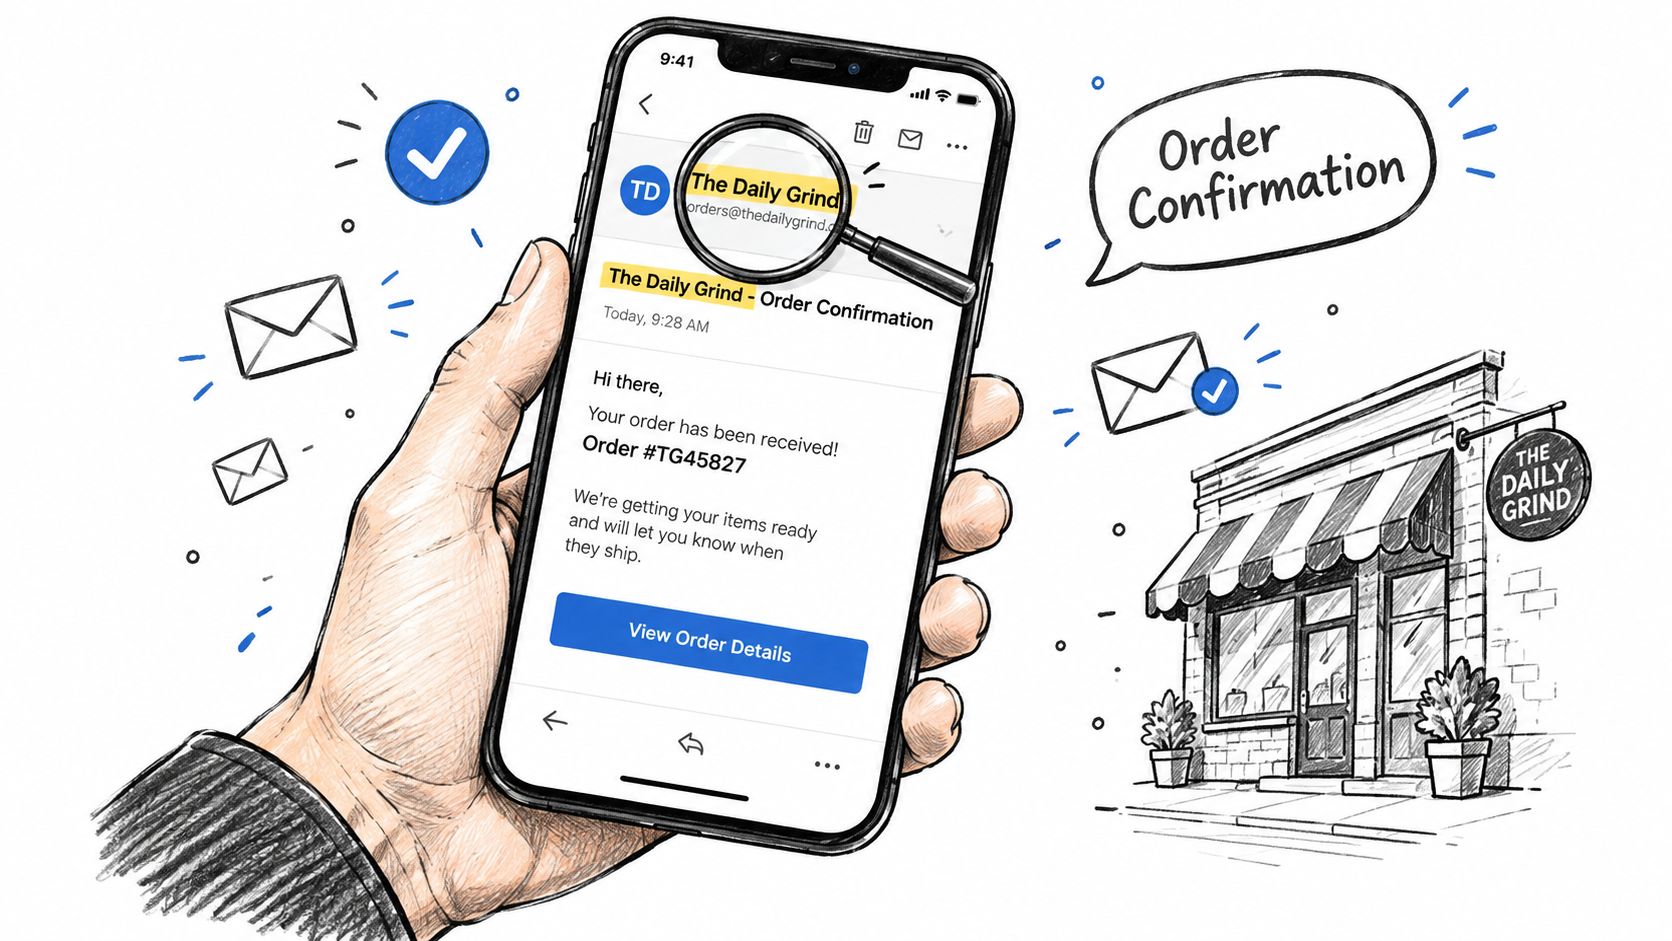
Shopify's email setup guidance explains that the store name can populate customer email subject lines through shop.name. That doesn't establish that every custom template, document, or app-generated message will adopt the new identity.
Build a before-and-after QA matrix
Capture the existing output before editing, then compare it with previews and test sends.
| Surface | Before the rename | After the rename |
|---|---|---|
| Order confirmation | Record subject, sender, logo, and footer | Verify approved name and working order link |
| Shipping, refund, and cancellation messages | Note old branding and contact details | Preview and test each message separately |
| Abandoned checkout and customer-account messages | Check identity and destination links | Confirm branding and intended destinations |
| Sender and reply-to details | Record display name and addresses | Verify each independently |
| Invoices and packing slips | Inspect printed branding and policy links | Generate a fresh sample and review it |
| App-generated content and order-status page | Capture visible text and customer links | Run the relevant journey and compare |
Check identity fields independently
The store name, store email, account email, and sender email are separate settings to review. Don't assume changing the name updates an address, or that a corrected sender address replaces hard-coded text in a footer.
Inspect subject lines, sender display names, reply-to addresses, logos, policy links, and Liquid variables. Where a template contains manually typed branding, give that text its own approval check.
For a closer review of the purchase message, use this Shopify order confirmation email guide.
Release gate: A successful preview isn't the same as a successful customer journey.
Place a test order and follow the resulting messages to the customer-facing record. Trigger the app-generated content your store uses, inspect the order-status page, and confirm that customers can recognize the business throughout the journey. Only mark a row complete when you've checked the output, not merely the setting.
Things That Often Break After a Rename
Troubleshoot according to what changed, not according to the date of the rebrand. A wrong footer points toward content or template work. A failed landing page after a URL change points toward routing or a stored address.
That distinction keeps your team from changing domain settings to solve a wording problem, or repeatedly editing the store name to solve an integration issue.
Match symptoms to targeted checks
| Symptom | Possible cause to investigate | Verification |
|---|---|---|
| A navigation item or blog link opens the wrong address | Hard-coded URL | Click the published link and inspect its destination |
| A paid campaign sends visitors to an unintended page | Old landing-page address | Open the destination configured in the ad platform |
| An integration stops completing its workflow | Domain-dependent webhook or callback | Compare the configured endpoint with the intended address and inspect delivery logs |
| Referral reporting looks inconsistent | Domain-related analytics configuration | Run a test journey and review its attribution |
| A connected ERP workflow fails | Stored URL or integration setting | Test the affected workflow with the integration owner |
| Search validation is incomplete | Ownership or migration checks weren't completed | Inspect Search Console access, canonical URLs, and sitemap availability |
These are investigation prompts, not proof that the rename caused a failure. Compare the current settings with your change log before editing anything else.
Don't broaden the repair unnecessarily
- Separate text from routing: Correct stale brand copy in the surface that produces it, rather than changing an address to match.
- Preserve working technical settings: Leave an integration identifier alone unless its owner confirms a dependency.
- Avoid speculative subdomain edits: Don't spend the restricted allowance as a troubleshooting experiment.
- Retest the exact failure: Open the affected email, URL, or workflow again after the fix.
Give support staff a short list of intentionally retained old-brand references. An existing technical address may be deliberate, while an old customer-facing logo may be unfinished work.
The lower-risk approach for most branding-only changes is to keep the technical URL stable and update the identity customers see. When the public URL must move, use the migration checks rather than treating every old reference as an error.
Your Rebrand Checklist and Common Questions
Rename for branding, migrate for customer-facing necessity, and verify output separately. That decision rule keeps a small label update from becoming an unnecessary infrastructure project.
Before approving the release, confirm that the administrative edit is saved, the domain decision is documented, and the customer-message matrix has real results. Record any deliberately retained references so another team member doesn't “fix” them later.
Keep the approved identity easy to apply
- Document the name: Include capitalization, shortened forms, and internal naming conventions.
- Approve visual assets: Specify which logo and colors belong in messages, documents, and storefront components.
- Retain test evidence: Save preview results and note any exceptions requiring follow-up.
A practical brand guidelines guide from Carlos Alba Media can help organize those decisions. For the asset-production side, consult this Shopify image sizes guide before replacing storefront and communication graphics.
Common questions before approval
Can I reverse the store name change?
For an administrative name correction, use the same Store name editing workflow described earlier. Keep the previous value available, but remember that reverting the label won't undo separate domain or template edits.
What happens to existing customer accounts and order history?
Don't treat renaming as creating a replacement store or as a reason to migrate records. As an acceptance check, open an existing customer account and historical order, then verify access and the branding shown around those records.
Will installed apps show the new name automatically?
Don't assume they will. Inspect each app's visible copy, notification settings, and customer links, especially anything embedded in the order-status journey.
What should I do first today?
Approve the exact name, record the current settings, and complete the administrative edit. Keep the previously discussed domain allowance and connection window in your change log, then finish message testing before announcing the rebrand.
ServeApps offers Shopify-native tools for self-service order changes, configurable cart drawers, and contextual upsell experiences. Visit ServeApps to explore those tools, and include their customer-facing settings and post-purchase journeys in your rebrand verification checklist.
Shopify Store Credits: Issuing, Redeeming and Accounting
Learn what Shopify store credits are, how they differ from gift cards and refunds, and how to issue, redeem and account for them.
Read more →
Can You Have Multiple Stores on Shopify? Plans and Limits
Can you have multiple stores on Shopify? Yes, through organizations or Plus expansion stores. Compare plan limits, eligibility and setup tips.
Read more →
Product Customizer App Shopify: Choosing the Right Tool
Compare native and third-party product customizer app shopify options on speed, theme support, variant mapping and SKUs before you install one.
Read more →