
The most repeated advice on a one-click upsell Shopify setup is simple. Pick a relevant product, show it after checkout, and watch average order value climb. That advice treats the offer as if every paid order can see it. It can't. Wallets, installment plans, gift cards, duties, and some delivery types shut the page off before persuasion starts. If you score the offer against all orders, you grade a test a large share of shoppers never sat.
A one-click offer is conditional infrastructure. Know which orders can receive it before you rewrite the creative or buy another app.
Table of Contents
- One-Click Upsell Basics and Why Merchants Use It
- Why Some Shoppers Never See the Offer and How to Audit Eligibility
- Where Upsells Appear and Which Setup Fits Each Point
- How the Post-Purchase Offer Flow Works Step by Step
- Measuring Upsell Results Without Fooling Yourself
- Choosing a Setup by Store Type
One-Click Upsell Basics and Why Merchants Use It
Say a traveler is already checked in. The concierge holds the room key, so a late checkout is one request, not a new registration form. A one-click upsell is that shortcut in a store. The offer shows after payment, or at a point in the buying flow where a payment method is already on file. The shopper accepts with one tap. There is no second checkout, no retyped card, and no new address.
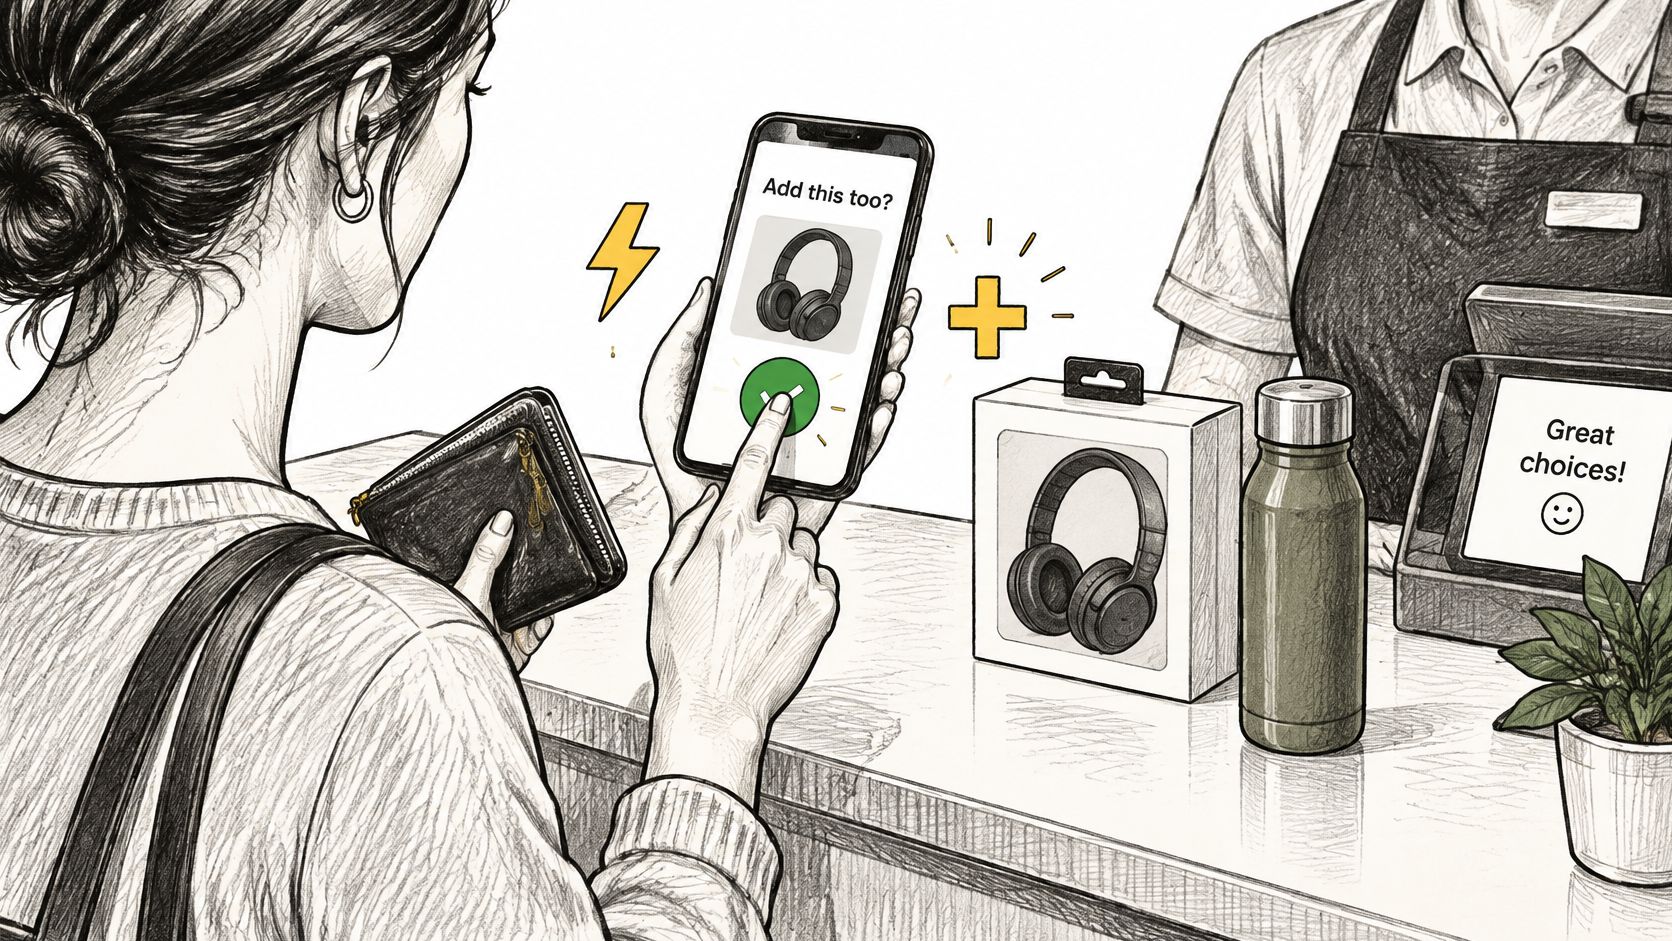
Picture someone buying headphones on a phone at the counter. Payment clears. A case appears with a small discount. One tap adds it to the order they just paid for.
Where the shortcut shows up
The same idea appears in three moments, and they are not interchangeable.
- While browsing: the shopper adds an item, and a popup or cart drawer offers a bundle or add-on.
- Right after payment: the post-purchase page offers a complement and charges the method already used.
- On the order status page: the customer edits the order and can swap a size or add a related item.
Merchants use it because the extra item joins a completed order. The shopper spends almost no effort, so a relevant add-on does not have to win a second checkout.
A standard cart upsell is a different tool. It suggests something before any payment, and the shopper still completes a full checkout. Useful for bundles, yes. It is not a one-tap charge on a card the store already holds.
Practical rule: If you can't say whether the shopper already paid, you are looking at a cart suggestion, not a one-click offer.
The stakes sit on a very large base. Shopify's fourth-quarter 2025 results exhibit reports that Shopify merchants generated approximately $378.4 billion in gross merchandise volume (GMV) during 2025, compared with $292.3 billion in 2024 and $235.9 billion in 2023. The 2025 figure represented year-over-year growth of about 29.5%, while 2024 had grown by approximately 23.9% from 2023. Shopify defines GMV as the value of orders facilitated through the platform after refunds, including shipping, duties, and taxes. GMV is not Shopify's revenue. A small lift in order value, applied only where an offer is eligible, still matters at that scale. If you can't tell a one-click offer from a cart suggestion, and you can't say which orders were eligible, you don't have a conversion problem yet. You have an exposure problem.
Why Some Shoppers Never See the Offer and How to Audit Eligibility
A low acceptance rate can mean the offer never reached the shopper. One-click post-purchase offers are conditional, not a universal checkout feature. Most write-ups skip that and jump straight to creative tips.
Shopify's product-offers documentation says post-purchase offers may not appear for wallets and installment providers, and they are unavailable in several other cases. Read each row as a filter on your order export, not as a footnote.
| Condition | Offer shown? | Why it matters |
|---|---|---|
| Apple Pay or Google Pay checkout | May not appear | Wallet shoppers may never see the offer |
| Klarna, Affirm, or Afterpay checkout | May not appear | Installment buyers may lose offers |
| Gift card or non-credit-card payment | Not available | Excluded from offer eligibility |
| Orders with duties or multiple currencies | Not available | Cross-border orders are excluded |
| Local delivery orders | Not available | Delivery type removes eligibility |
| Sales channels other than Online Store | Not available | Other channels receive no offer |
Wallet and installment rows are "may not appear," which is already enough to distort a blended rate. The other four are hard exclusions. Same documentation also limits customers to three accepted post-purchase offers per checkout and requires a minimum order price of $0.50. Hitting either limit is an infrastructure outcome, not a copy failure.
The measurement gap
Say 40% of last month's orders used Apple Pay, Shop Pay isn't in that excluded list the same way, but Klarna and gift cards are, and another slice shipped with duties. A merchant who reads a 2% accept rate against all orders will call the product irrelevant. A large share of that traffic was never eligible. The offer didn't lose. It wasn't in the room.
Split the funnel before you split-test the headline. Eligible-impression rate and acceptance rate answer different questions, and blending them hides both.
Run the eligibility audit
- Pull 90 days of orders. Use a window long enough to cover a promo and a quiet stretch, so one campaign doesn't set the baseline.
- Split by payment method, currency, duties, delivery type, and sales channel. Tag each order eligible or not using the table above. Wallet and installment orders go in a "may be excluded" bucket until you confirm they saw an impression.
- Record the eligible-order share. That share is the denominator for every acceptance rate you publish internally.
Use the share to decide where a different strategy belongs. A store with heavy cross-border duties should test offers on single-currency domestic orders first, because duty orders are excluded. A store whose Online Store card mix is healthy can run post-purchase offers there and stop expecting the same page on other channels. One merchant put it plainly after turning on customer-facing order editing: "The setup was surprisingly easy, and we had the customer-facing order editing live in under 15 minutes." Speed of setup doesn't fix a tiny eligible share. Measure that share before you judge an offer or buy an app.
Where Upsells Appear and Which Setup Fits Each Point
Placement is a choice about shopper intent, not about which page gets the most sessions.
| Placement | When shoppers see it | Needs Shopify Plus | Shopper effort | Best fit |
|---|---|---|---|---|
| Add-to-cart popup or cart drawer | While browsing, after adding an item | No | Low, one tap | Bundles and add-ons |
| Post-purchase offer page | Right after payment, before confirmation | Check app and plan | Low, one click with stored payment | Complementary items |
| Order status page edit | After purchase, when the shopper edits the order | No | Low, guided choice | Size or variant swaps |
| Checkout upsell | Inside the checkout flow | Yes | Low | Last-chance offers |
Why the ranking follows intent
Cart-stage offers sit next to an open decision. The shopper is still assembling the order, so a bundle or add-on matches what they are doing. Brands that sell coordinated sets, such as the SleepHabits bundle builder, show the pattern. The extra piece belongs in the set the shopper is building, not on a page after they have already left. Friction is the trade-off. Too many popups, or a drawer stuffed with unrelated items, can slow the path to checkout. One offer tied to the product just added beats a carousel.
Post-purchase offers land after the shopper has committed. Complementary items fit because the original sale is already safe. The trade-off is reach. Only eligible checkouts see the page, and some buyers won't pause on it. Check the app and the plan in current Shopify documentation before you plan this placement. That requirement is not the same thing as checkout placement, which needs Shopify Plus.
Order status edits suit a shopper who already wants a change. A size or variant swap, or a related add while they fix the order, meets intent they brought with them. A random accessory on that page usually doesn't.
Checkout upsells are the only row that changes checkout itself, and only on Plus. Keep them to a last-chance offer. Checkout is a poor place to educate.
Match the placement to the reason the shopper is still buying, not to the highest-traffic page. A practical map of those moments sits in this walkthrough of the Shopify upsell funnel.
How the Post-Purchase Offer Flow Works Step by Step
The post-purchase path is short on purpose. Each step either keeps the original order intact or adds one item without a new checkout. The diagram below is the spine. The slips underneath are where live stores lose the tap.
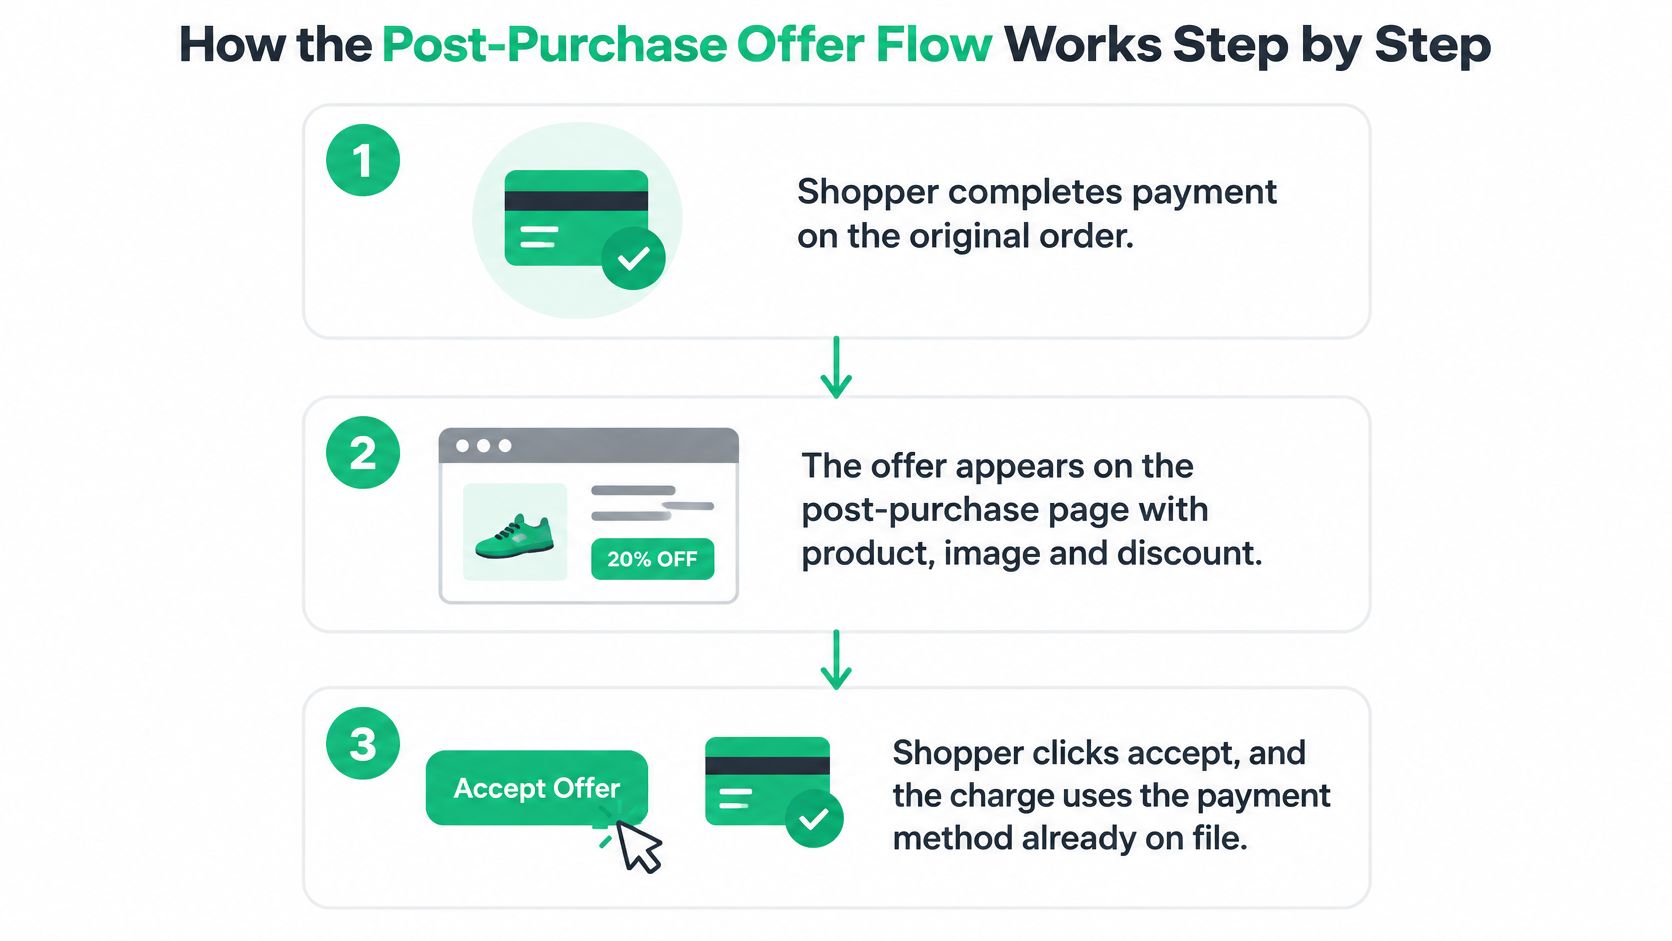
- The shopper completes payment on the original order. The sale is done before any offer appears, so a decline can't unwind it. The slip is treating this page like a second checkout and adding fields the shopper already finished.
- The offer appears with the product, the image, and the discount. People accept what they can see. A discount that exists in the app but not on the page reads as a full-price add-on, and acceptance drops for a reason that has nothing to do with the product.
- The shopper clicks accept, and the charge uses the payment method already on file. That stored method is the whole point of one click. If the method can't be charged again, this step never starts, which is an eligibility issue, not a button-color issue.
- The discount applies automatically. Set it per product as a percentage or a fixed amount, at a level the margin can carry. A discount deeper than the item's contribution trains shoppers to wait for the post-purchase price and cheapens the catalog.
- The added item joins the order, and taxes and totals recalculate. A missing tax setting makes the new total look wrong next to the confirmation, and support tickets follow a "success." Price differences on later edits should charge upgrades and refund downgrades so the order total, taxes, and reports stay aligned.
- A decline loads the confirmation page with no changes. The decline path has to be obvious. Hiding it turns a low-effort offer into a trap, and that costs trust you already earned on the original order.
For a closer look at the page itself, this short walkthrough shows the same sequence on a live-style checkout:
What a healthy first week looks like
In the first seven days, three things should agree. Offers shown should match the eligible orders you expected, not total orders. Accepted offers should appear as line items on those orders. Recalculated totals should match what finance sees in order records, including tax. If shown counts are far below eligible orders, the filter is tighter than you thought. If totals disagree, fix tax and discount display before you touch the creative.
Measuring Upsell Results Without Fooling Yourself
Two rates matter more than a single blended conversion number. Eligible-impression rate is orders shown an offer divided by all orders. Acceptance rate is accepted offers divided by eligible orders shown. An acceptance rate means nothing until you know the eligible share.
| Metric | Calculation | What it tells you |
|---|---|---|
| Eligible-impression rate | Orders shown an offer ÷ all orders | How much traffic can see offers |
| Acceptance rate | Accepted offers ÷ eligible orders shown | Offer relevance to eligible shoppers |
| Upsell conversion rate | Conversions ÷ impressions for each popup | Performance of each offer |
| Upsell revenue per order | Upsell revenue ÷ all orders | Real contribution to order value |
| Average order value change | AOV after offers vs a control period | Net effect after seasonality |
Per offer, report impressions, add-to-carts, conversions, conversion rate, and revenue over time. A frequency cap stops the same shopper seeing the same offer on every visit, so impression counts stay honest instead of inflating from repeat views.
Read the two rates together
Say a store has 1,000 orders in a week. 600 are eligible and were shown an offer. 60 accept. Eligible-impression rate is 60% (600 of 1,000). Acceptance rate is 10% (60 of 600). Read alone, 60 accepts on 1,000 orders looks like a 6% result and a weak offer. Read together, reach is the constraint for the 400, and relevance is a separate question for the 600. Fix the payment mix or the market before you blame the product. Then judge the 10%.
Revenue per order compared with all orders will always look smaller than revenue per eligible order. Publish both, or you will underfund a placement that only a slice of checkout can see.
Average order value needs a control period. A holiday, a sitewide sale, or a traffic shift can lift AOV while the upsell did little, or hide a real lift inside a slow month. Hold the offer still and compare a similar stretch without it. For a wider look at what "good" acceptance looks like once the denominator is honest, see how to read upsell conversion rates.
Review each metric weekly. Write the eligible share on the same line as the conversion rate. If the share moves because you launched a wallet promo, the conversion rate didn't suddenly get worse.
Choosing a Setup by Store Type
Eligibility first, persuasion second. The setup that fits is the one your payment mix and channels can deliver.
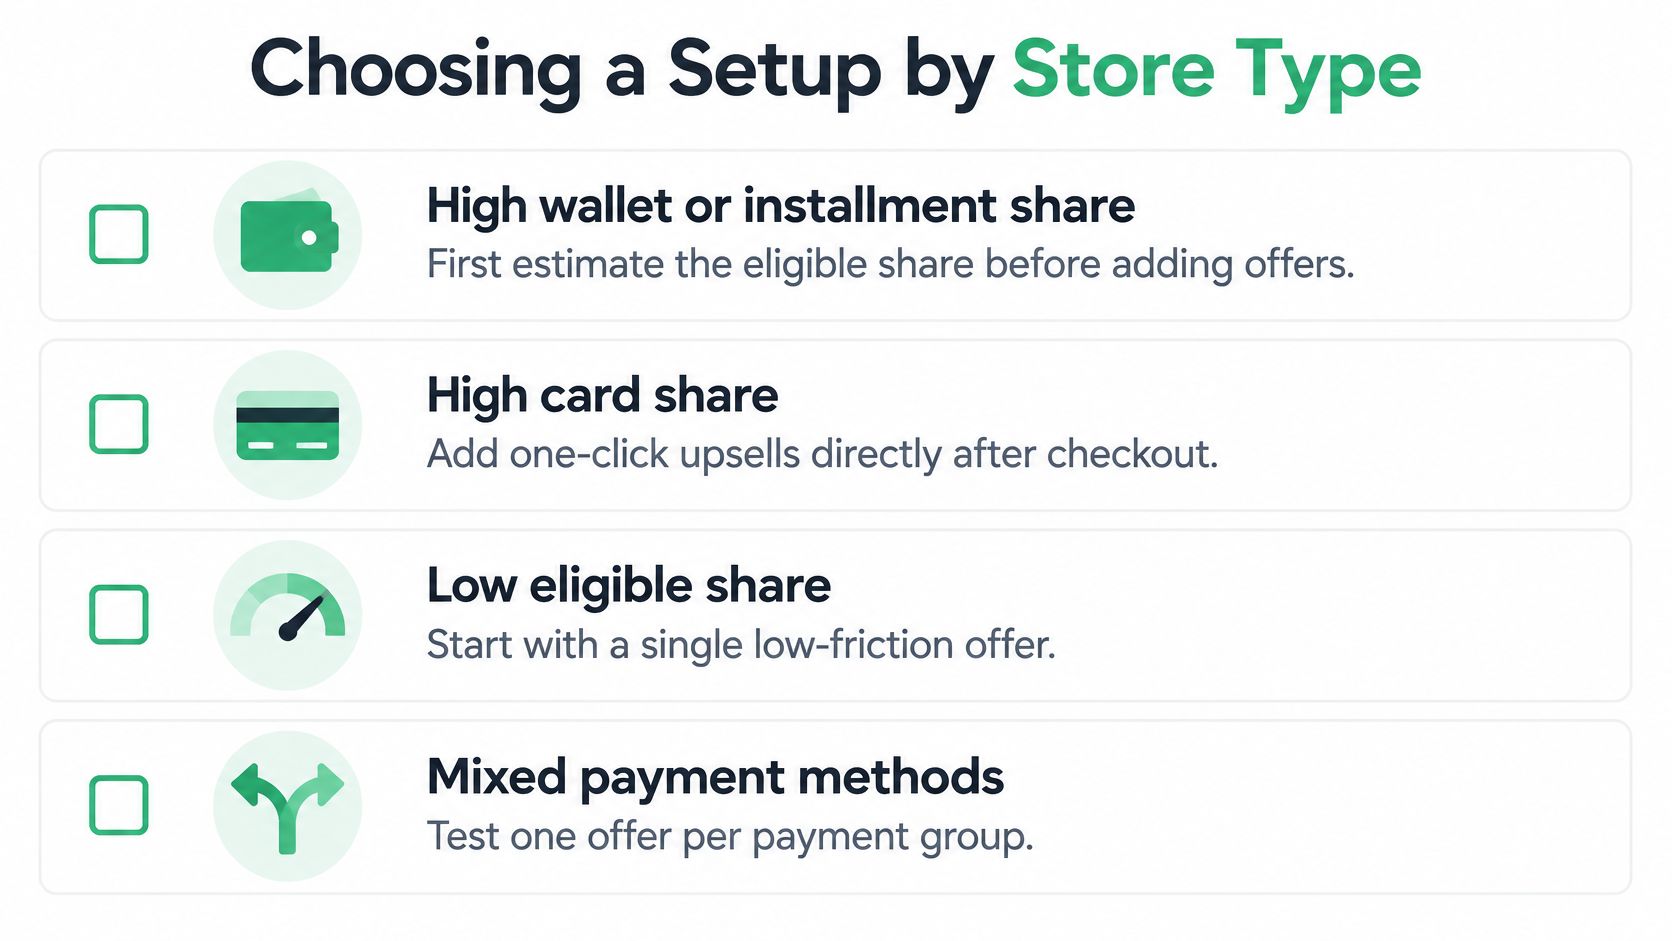
High wallet or installment share. Estimate the eligible share before you add offers. If wallets and installment plans dominate, a post-purchase page will look broken in a blended report. Put effort into cart-stage offers those shoppers can still see, and judge post-purchase only on card orders that qualify.
Several sales channels. Focus offers on Online Store traffic and separate channels in reporting. Marketplaces and other channels won't receive the post-purchase page, so a storewide goal will always undershoot.
Cross-border orders and duties. Test in a single currency with no duties first. Duty and multi-currency orders are excluded, so a global rollout hides a domestic result that may be fine.
Subscription products. The offer has to respect the purchase option the shopper already picked. A one-time add on a recurring item, or the reverse, creates a support problem that wipes out the extra revenue. Selling-plan aware choices, one-time or recurring per variant, keep the add-on consistent with the original order.
Support-heavy order edits. Order-edit upsells fit when people already open the order to change a size or address. A recommendation in that flow meets intent and can cut tickets. A static thank-you pitch doesn't, because the shopper didn't come there to fix anything.
What to do in the first four weeks
We keep the tool choice narrow on purpose. UpServe shows branded add-to-cart popup upsells, including frequently bundled offers with a discount you set per item, can trigger on add to cart, and can use a frequency cap. SelfServe covers order-edit upsells on the order status page, including selling-plan choices on subscription variants. Checkout upsells need Shopify Plus. You don't need a developer for a basic setup.
- Choose one placement from the comparison table that matches your eligible-order share.
- Set one offer per product with a discount the margin can afford.
- Track acceptance rate and average order value against a control period for four weeks before you change the offer.
If you are comparing stacks, start with the audit, then read a practical shortlist of upsell apps for Shopify. Buying first and measuring later is how stores blame a product the shopper never saw.
ServeApps builds Shopify apps for the moments after an item hits the cart and after the order is placed, including add-to-cart upsells and self-service order edits that can carry a one-click add. If your eligible share is the missing number in your upsell report, start there and see how the pieces fit on ServeApps.
What Is Upsell? Examples and How Shopify Stores Use It
What is upsell? Learn the definition, how it differs from cross-selling, and how Shopify stores use upsells to raise order value.
Read more →
Increase Conversion Rate on Website: 9 Proven Cart Tactics
Increase conversion rate on website with cart, upsell, and testing tactics. See what lifts AOV, cuts abandonment, and how to apply each one today.
Read more →
8 Self Service Store Examples: Benefits and Tactics
Explore 8 self service store examples, from cashierless checkout to post-purchase portals, with benefits, trade-offs, and tactics you can copy.
Read more →